Creating Pads | |||
| |||
-
From the Model or Essentials
section of the action bar, click
Pad
 .
.
The Pad.x dialog box appears and the app previews the pad to be created.
 By default, the app extrudes normal to the plane used to create the profile. Note: You can specify the required direction in the Direction box.
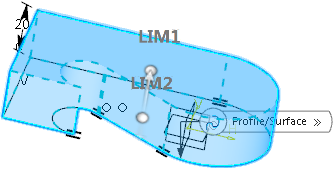
-
Select one of the following feature type:
Option Description Creates a pad. 
Creates a thin solid. By default, By default,
is selected. Different options and parameters are available for the selected feature types.
-
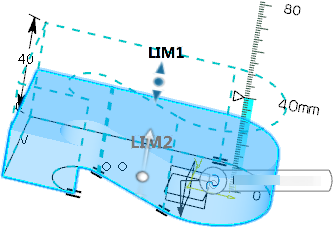
In the
Length
box, enter the required length value.
Important: - You can increase or decrease length values by dragging LIM1 or LIM2 handles.
- The length value should be less than 1,000,000 mm.
- To set equal length in both the directions, click
 .
.
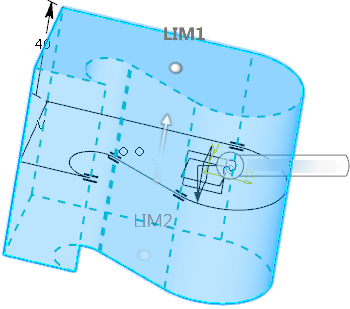
- Optional:
Click
 to extrude the profile in the opposite direction using
the same length value.
to extrude the profile in the opposite direction using
the same length value.
-
Optional: Click Preview to see the result.
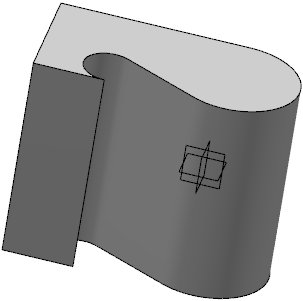
The pad is created. A Pad.x feature is added to the tree.