Creating a Material Variant | ||||
| ||||
-
Optional: If the material you want as an option for the first
variant is not yet applied to the required objects, select this material and
apply it to the objects (these can be parts or products).
To do so, from the Perception Experience section of the action bar, click Material Palette
 , and select a material in the panel. Then, in the 3D area, click the objects to which the material should be applied. Note: You can also apply the material directly on the model using the level selector, or in the tree available in the Project panel.
 -
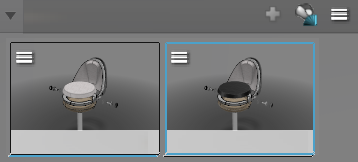
In the Variant panel, in the Material
line area, click
 to create the first variant thumbnail.
- Optional:
Rename the variant thumbnail if
needed.
Your first material variant is created.

-
You can create another material variant by replacing quickly a given material
on all or most objects carrying it.
-
In the tree or in the 3D area, right-click an object that carries the material to replace (in the
tree, you can also directly right-click a material), and in the context menu, select Select objects
with same material.
All exposed objects carrying this material (even hidden ones) are selected, and highlighted in both the tree and the 3D area. If necessary, you can remove some objects from the selection, or add some objects to the selection.
-
In the action bar, click Pick and Apply to
Selection
 .
.
- In the Material Palette, in the Materials node of the Project panel, or directly in the 3D area, click an object that carries the replacement material.
The material you picked is immediately applied to the selected objects. -
In the tree or in the 3D area, right-click an object that carries the material to replace (in the
tree, you can also directly right-click a material), and in the context menu, select Select objects
with same material.
-
With the objects still selected, in the Variant panel,
at the upper right of the Material line area, click
 .
.

Your other material variant is added to the material line.
You can showcase
these and other variants in a stage variant. For more information, see
Creating a Stage.