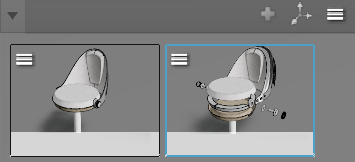
Creating a Position Variant

You can create position variants to show the product in different static states like open doors, or deployed bike stands. You can also create position variants from kinematics animations (a single animation per variant). Position variants based on object positions and kinematics animations can be mixed in a same position variant line.

Let's take as an example a carry-over scenario where a new version of a car is being designed. A car designer can create the following two position variants:

  • An object-based position variant showing a new door opening animation concept.
  • A kinematics animation-based position variant showing the opening of the current version of the car (using an existing kinematics animation created by the mechanical engineers).
    Note: Kinematics animations (that is, animations of a kinematics simulation) are created with Mechanical Systems Experience. For more information, see the Mechanical Systems Experience User's Guide.

Important: Every single real-life part must have been defined as a single physical part in the inserted physical product in order to apply product, material or position variants to it.


Before you begin: Insert a product in the experience. For more information, see Inserting a Product in the Experience.
See Also
Defining Kinematics Animation Parameters
  1. Select the part(s) or product(s) showing the position to capture as a object-based variant.
  2. In the Variant panel, in the Position line area, click the plus button to create the first variant thumbnail.


  3. Optional: Rename the variant thumbnail if needed.
    Your first object-based position variant is created.

  4. To create other position variants, you have the following possibilities:
    • For an object-based position variant, change the position of the selected part(s) or product(s).
    • For a kinematics-based position variant, select a kinematics animation in the tree.
      Note: Animations are available in the Project panel, under Actors > 3D > Your_product > Animations.
  5. In the Variant panel, at the upper right of the Position line area, click the plus sign .
  6. Optional: Rename the variant thumbnail if needed.
  7. Repeat steps 4 to 6 as many times as necessary.
    Your other position variant is added to the position line.

You can showcase these and other variants in a stage variant. For more information, see Creating a Stage.

Tip: Imagine a car door with three position variants: a closed position, a normal opening, and a gullwing opening. In Play mode, the transition between the two open positions looks awkward. To workaround this, you can define the closed car door a "go-between" position between variants. This "go-between" position is known as the neutral position.

To define one of the positions as being neutral, click the menu on the variant thumbnail, and in the context menu, select Set as neutral position.