Item Editor
The item editor provides tools for defining and editing Manufacturing Assemblies.
The editor comprises of the following elements:
- A grid on which you can build an item flow represented
by tiles in a graph
- A tree
- A group of commands enabling you to insert items,
manage the grid layout, and so on.
The
item representations in the graph are known as predecessors (that is, child items) and successors (that is, parent items). Items are
connected by data requirement links and precedence constraints, and this represents the item
flow.
A data requirement link goes from the output of a predecessor to the
input of its successor. A precedence constraint connects two sibling
items on the same level.
 By default, data requirement links appear in blue and precedence
constraints appear in orange. You can customize Connection colors in
. By default, data requirement links appear in blue and precedence
constraints appear in orange. You can customize Connection colors in
.
Tile Description
Tabs on Tiles and Context Toolbar
Tabs on tiles and a context toolbar are provided in the item editor for analyzing the
Manufacturing Assembly structure, identifying which predecessors are used, and rerouting items.
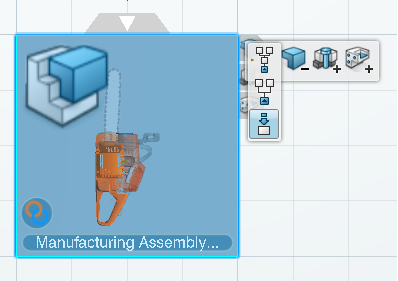
Contextual Commands for Expand/Collapse and Hide/Show
Contextual commands to expand and collapse the graph, and to hide or show
Provided Parts, Manufactured Parts, and Fasten steps are available. For more information, see Managing the Tiles in the Graph.

Contextual Commands for Rerouting
Contextual commands to reroute items that have inputs (such as Manufacturing Installation, and Transform) are available. For more information, see Rerouting Items.
Item-Product
Scope Management
You can manage Item-Product scopes in the item editor.
The Item-Product scope delimits a subset of the product structure that can be implemented by an
item. For example, this enables product structure subsets to be isolated and
assigned to different system planners. The scope is defined by an implement link from a reference item to a reference
product. For more information, see Item-Product Scope.
In the item editor, you can:
- Define the scope between an item and a product using the Create
Item-Product Scope contextual command. In this case, the Item-Product scope
 icon appears on the tile icon appears on the tile
- Delete the scope between an item and a product using the Remove
Item-Product Scope
 contextual command. contextual command.
Note:
A scope between an item and a system can be defined in Process Planning
app. In this case, the System-Item scope  icon appears on the tile. icon appears on the tile.
Item Management
A number of capabilities are available for managing items in the item editor.
Capabilities include:
- Insert Predecessor context menu on tile.
- Insert Predecessor context menu in the tree.
- Drag and drop to modify data requirement links.
Selecting Products
Products can be selected using the 3D view in the item editor, Smart
Zoom, and tree.
Smart Zoom Capability
The Smart Zoom capability is useful for investigating the 3D
representation and for selecting and assigning products. It can be activated at
any time by pressing F6. The 3D representation becomes
detached from the tile and then it can be rotated and zoomed. Note:
Press
F6 again to exit the Smart
Zoom.
Digger Functionality in Smart Zoom
The digger functionality is available when Smart Zoom is
active. It is used to temporarily disable geometry that hides other parts of 3D.
Move the mouse cursor onto the outer geometry and press
F7. The hiding geometry becomes transparent and the
hidden geometry can be selected or also made transparent. Press
F8 to make the geometry visible again. For more
information, see Using
Digger.
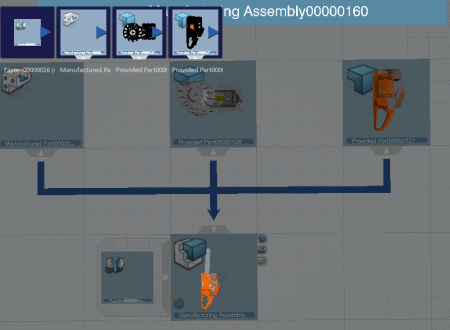
Thumbnail Navigation in Smart Zoom
In Smart Zoom mode, you can click a left-hand or right-hand thumbnail
to change to a predecessor or successor in the graph.

Show Unassigned Parts Using Smart Zoom and the
B.I.
Essentials
Panel
In Smart Zoom mode, when Product Assignment
Status is clicked in the B.I.
Essentials panel, two contextual commands enable you
to display either the unassigned parts or all the parts.
Right-click
an empty area, then click Show Only Unassigned Parts to
display the 3D representation with only the unassigned parts.
Right-click an empty
area, then click Show All Parts to display all the parts
again.
You can navigate to a predecessor or a successor using the thumbnails. To do this, quit and
relaunch the Smart Zoom. Note:
The Show All
Parts, or Show Only Unassigned Parts
display mode is kept.
Product to Item Assignments
A product can be assigned to an item using a variety of methods such as Drag
and Drop, Smart Zoom, and assignment
assistant.
When a product is assigned to a Manufacturing Assembly, a Provided Part is created with an implement link to the assigned product.
For more information, see:
Assign Products Using Drag and Drop
It is possible to drag a product, a part, and a fastener from the tree to a tile
or another node in the tree. The rules are as follows:
- When you drag a tile or element from the tree to the border of the
viewer, the grid automatically pans in the direction of the mouse
cursor.
- The implemented parts and fasteners can be displayed in a list by
pressing F5. For more
information, see Use the F5 List to Show and Reassign Objects.
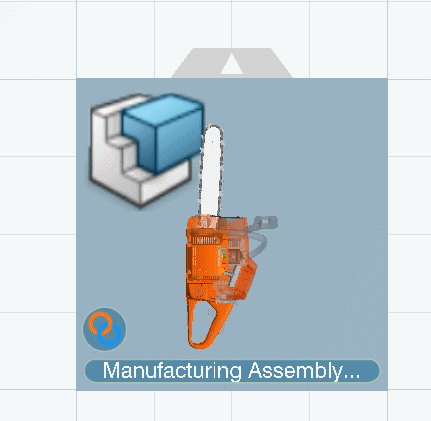
- When items implement products, parts, and fasteners that have 3D
information, they are shown on top of the item tiles.
- Parts that are displayed on top of item tiles can also be dragged
directly from these tiles to other item tiles.
- When you drag an object, the grid automatically centers on the selected
object.
The following table summarizes the behavior for dragging and dropping a product
onto a Manufacturing Assembly: Notes:
- If the product is already assigned to at least one item in the
session, a dialog box appears asking whether or not you want to
assign the product again.
- If the product is not declared as
Manufacturable/Procurable, the system asks for a
confirmation to assign it.
| Product implemented by a single object |
Product implemented by multiple objects |
Drag and drop pressing
Ctrl |
|
The implemented Manufactured Part is rerouted under the target Manufacturing Assembly.
|
A dialog box appears to indicate that there is already an
implement link and requires confirmation before creating
a new one.
If you click OK, a new Manufactured Part is created under the target Manufacturing Assembly.
The Part is assigned to the created Manufactured Part.
|
A new Manufactured Part is created under the target Manufacturing Assembly.
The Part is assigned to the created Manufactured Part.
|
The following table summarizes the behavior for dragging and dropping a part onto
a Manufactured Part: Note:
If the part is not declared as Manufacturable/Procurable,
the system asks for a confirmation to assign it.
| Part implemented by a single object |
Part implemented by multiple objects |
Drag and drop pressing
Ctrl |
|
The Part is assigned to the target Manufactured Part.
|
The Part is assigned to the target Manufactured Part.
|
The Part is assigned to the target Manufactured Part.
|
The following table summarizes the behavior for dragging and dropping a product
onto a Provided Part: Notes:
- If the product is already assigned to at least one item in the
session, a dialog box appears asking whether or not you want to
assign the product again.
- If the product is not declared as
Manufacturable/Procurable, the system asks for a
confirmation to assign it.
| Product implemented by a single object |
Product implemented by multiple objects |
Drag and drop used with
Ctrl |
|
The previous implemented link is deleted and a new link
is created.
|
A dialog box appears to indicate that there is already an
implement link and requires confirmation before creating
a new one.
If you click OK, the product is
assigned to the target Provided Part.
|
The product is assigned to the target Provided Part.
|
Note:
When Spot Fastener Assembly or Single is dragged and dropped onto a Manufacturing Assembly, a Fasten step is created to implement it. Sometimes a product is dragged and dropped
onto a Manufacturing Assembly and it is already assigned to a Manufacturing Assembly in the session. In this case, the implemented Manufacturing Assembly is rerouted under the target Manufacturing Assembly.
Assign/Unassign Parts Using Smart Zoom When parts and fasteners that are displayed as unassigned, you can assign them to the current item by double-clicking them in Smart Zoom mode or by using the Assign Part to Current Item contextual command. For example, in the Smart Zoom mode, if you select an unassigned part, then
assign it to the current item using the contextual command. The part is no
longer displayed. When you exit the Smart Zoom mode by pressing F6, the assigned part is visible on the tile. Note:
If the object is not declared as Manufacturable/Procurable, it is not proposed as an assignable product and is displayed in transparency.
Assign Product to Item Command
The
Assign Product to Item
 command in the Authoring section
of the action bar enables assigning a product to a selected item. The product is then displayed
on the tile. command in the Authoring section
of the action bar enables assigning a product to a selected item. The product is then displayed
on the tile.
If a product is already assigned to at least one item in the session, a dialog
box appears asking whether or not you want to assign the product again. Note:
The
3D localization part of a bead fastener cannot be selected, so this part
cannot be assigned to an item.
If the product is not declared as Manufacturable/Procurable, the
system asks for a confirmation to assign it.
Unassign Product from Item Command The
Unassign Product from Item
 command in the Authoring section
of the action bar enables unassigning a product from an item directly in the item editor or in
Smart Zoom mode. This command is available for all item
types except Manufacturing Assembly and Manufactured Part. command in the Authoring section
of the action bar enables unassigning a product from an item directly in the item editor or in
Smart Zoom mode. This command is available for all item
types except Manufacturing Assembly and Manufactured Part. Show Assigned Items Only Command The Show
Assigned Items Only
 command in the Authoring section
of the action bar shows in the 3D view only those items that are related to the item, and hides
others. This command is available for a Manufacturing Assembly only. command in the Authoring section
of the action bar shows in the 3D view only those items that are related to the item, and hides
others. This command is available for a Manufacturing Assembly only. Implementation Management for Multi-Instantiated Products
For item types that implement products, it is possible to reuse an existing item reference when multi-instantiated products
are implemented. This is available for all product-to-item assignments:
Drag and Drop, Assign Product to
Item
 command, Smart Zoom, Assignment
Assistant, Create/Update commands, and F5 list. command, Smart Zoom, Assignment
Assistant, Create/Update commands, and F5 list.
For implemented products, the Use same item
reference to implement multi-instantiated parts
option must be selected in
.
Cross Highlighting Between Item Editor and Tree
The cross highlighting capability enables objects to be
highlighted simultaneously in both the item editor and the tree.
For example, if an item tile is selected, the tile and the corresponding node in the tree are
highlighted.
Management of PPR Editor Views
The item editor, system editor, and 3D view can be
displayed as independent widgets of the same tab.
App Transition
Transition to an app that uses a system editor opens a system
editor widget. This is the only widget for this type of DELMIA app.
Transition to an app that uses an item editor opens an item
editor widget. This is the only widget for this type of DELMIA app.
Opening a PPR Structure in Different Widgets
When you open a PPR structure, the structure is opened in the
widget corresponding to the last compatible app.
For example, if Manufactured Item Definition was the last compatible app opened, the PPR structure opens in an item editor widget.
Then, if you start Process Planning, the structure opens in a system editor widget in the same tab.
Finally, if you start Planning Structure, the structure opens in a 3D view widget in the same tab.
App Transition for Apps with Same Type of Grid
If you switch from one DELMIA app to another that has the same widget type, you change app.
For example, you can switch from Manufactured Item Definition to Fastened Item Definition. In this case, the item editor widget stays open but the current app is now Fastened Item Definition. As shown by the app name in the window header and the commands in the action bar.
Special Transition
Special transition is a quick way to open a structure in a
specific app.
For example, search and then select a structure you want to
open. Then, you can select the app where you want to open the structure from the list of apps. The structure opens in the selected app.
New Content
If you select a new system or workplan from the New Content panel, by
default the system opens in a system editor widget. However, if the last opened
widget was a 3D view widget, the system opens in a 3D view widget.
If you select a new item from the New Content panel, by
default the item opens in an item editor widget. However, if the last opened
widget was a 3D view widget, the item opens in a 3D view widget.
|
![]() By default, data requirement links appear in blue and precedence
constraints appear in orange. You can customize Connection colors in
.
By default, data requirement links appear in blue and precedence
constraints appear in orange. You can customize Connection colors in
. 
 : appears if the
  : appears in the upper right if a resource
is associated with the item.
 and down
  arrow commands are displayed at the input and output of a tile. These
commands enable you to expand or collapse the graph to show predecessors or
successors.

