Recognize Areas Manually
You can use interactive tools to
segment the tessellation.
-
From the Surface Reconstruction section of the action bar,
click Tessellation Segmentation
 and select the tessellation.
- In the dialog box that appears, select No.
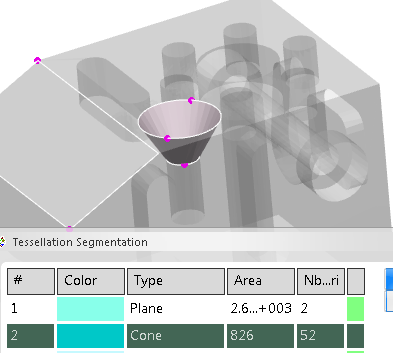
- The Tessellation Segmentation dialog appears. It is empty.
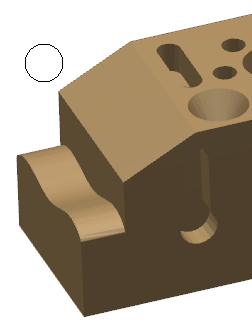
- The cursor is replaced by a brush represented by a circle.
- To create a segmentation:
- Select the segmentation tool: Anytime you need to access a tool, right-click the brush or the hand to display the context toolbar.
This context toolbar gives access to more tools, that appear as required.
-
 Pick to select existing areas.
-
 Brush Mode to edit the segmentation. This mode gives
access to those propagation tools:
-
 With Angle
-
 Plane
Plane
-
 Sphere
-
 Cylinder Cylinder
-
 Cone
Cone
-
 Torus
Torus
-
 Fillet
-
 Triangle
-
 Edit Radius to edit the radius of the brush.
-
 Edit Angle to edit the angle used by a propagation
tool.
Refer to the following steps for their operating modes.
- Click
 to edit the radius of the brush. to edit the radius of the brush. - Pick a point or brush an area.
- The triangles are displayed as you reach them.
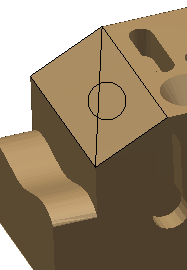
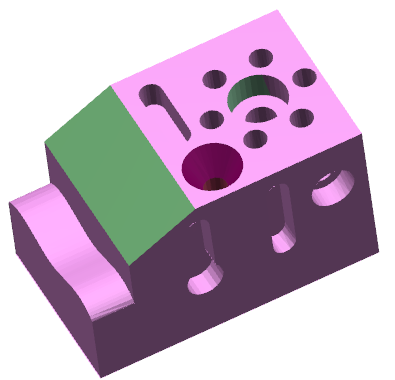
- Areas are recognized, colored, and added to the list in the dialog box.
- To define an area by propagation with an angle criterion.
- Select With Angle
 . . - Click Edit Angle
 to define an angle. to define an angle. - Pick a point (thus a triangle) on the tessellation.
The triangles surrounding this point, that meet this angle criterion (between their normals and that of the picked triangle) are merged in a new area. The area is added to the dialog box.
- To define an area by propagation with a canonic shape criterion.
- Select either
 , ,  , ,  , ,  , , or or  . . - Pick a point. If the selected canonic shape is found, a new area is created and added to dialog box.
- To define an area by triangle, select
 Triangle and pick one triangle. Triangle and pick one triangle. A mono-triangle area is created. - To extend an existing area, brush an area by starting in the area you want to extend.
- The information of the extended area is updated in the dialog box.
- To merge two areas, hold down Ctrl and brush the two areas to merge.
- To detach an area, hold down Ctrl and pick the area to detach.
This is useful when the main area contains several nonconnex subareas. -
To
compute an area, hold down Ctrl and pick the area.
The area must contain only one connex subarea.
- To split an area in two, hold down Shift and drag the brush over the area you want to split.
Note:
Triangles are not split.
The dialog box is updated accordingly.
Recognize Areas Automatically
You can recognize areas automatically.
Click Tessellation Segmentation  , and select the tessellation.
- In the dialog box that appears, select Yes.
- The areas are computed automatically, and recognized as:
- Planes
- Cylinders
- Cones
- Spheres
- Tori
- Fillets
- Free surfaces
- No form (same as free surfaces, but not taken into account while generating the BRep).
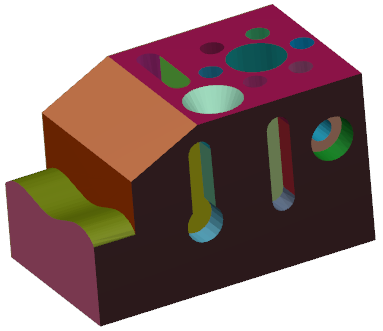
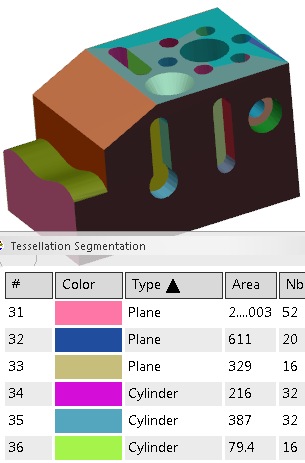
- The Tessellation Segmentation dialog box appears. It is populated.
- The cursor is replaced by a brush represented by a circle, with the same context menu as explained above.
Work in Both Modes
In both modes, you can retrieve information from the dialog box, as well as change the display mode of the segmentation for a better control.
- Recognize segmentation areas as explained above (either manually or automatically).
- Whatever the method used, the dialog box is populated with information on the recognized areas.
- Select a column header to hide or show the columns.
- The blue/white toggle on the right lets you select all (blue), or no (white) lines.
- Multiselection of lines by Ctrl and Maj is available.
- Click the header of a column to sort the information on the column criterion.
- Rank, type, area, number of triangles are the available criterion.
- Color and diagnostic (last column) are no sorting criterion.
- Right-click the Type header to access further display filters.
-
Double-click the type of an area to change it to one of the types of the list.
-
Alternatively, right-click several lines and select Edit
to do the same from the list that appears.
The list of types proposed may vary.
- Alternatively, pick an existing area (
 ) in the work area. ) in the work area.- It is highlighted in the work area. The underlying surface is displayed too (when available).
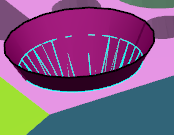
- The corresponding line is highlighted in the dialog box.
- A box is displayed to change the type of the area.
- Select a display type:
- Highlight a segmentation area in the work area from the dialog box.
- Pick a line in the dialog box to highlight the corresponding area.
- Double-click a line in the dialog box to highlight the corresponding area and reframe on it.
Multiselection of lines by Ctrl and Shift is available. - Right-click a line in the dialog box and select Display Neighbors to highlight this area (triangles) and its neighbors (color).
- Check the last column of the list.
It gives a diagnosis about the area. - If the patch is green, the area is OK.
- If the patch is red, the area contains defects such as non-manifold elements or triangles with a
very small size that can lead to problems when generating the BRep.
A Tessellation Segmentation feature is created.
Create a BRep
You can create a BRep from a tessellation segmentation.
- Right-click a tessellation segmentation under the tree, and select Tessellation Segmentation To BRep.
A datum is created. - If the whole model could not be processed, as many surfaces as possible are created.
- Areas that are given the NoForm type during the segmentation are ignored.
- The output is a solid if the BRep can be closed, that is, if it has no free edges. The output is
a surface otherwise.
Note:
If you disassemble a tessellation segmentation using Disassemble Data, the areas are merged by type.
-
If the BRep cannot be closed because of free edges, select the tessellation
segmentation again, and click Play in the Compass.
- The Tessellation Segmentation dialog box opens again to let
you edit the tessellation segmentation interactively.
- The number of free edges is displayed in an information box.
- A mini player becomes available.
- Click Play in the mini player.
A reframe is done on the first free edge. - Inspect and fix the free edge as required.
- Click Play again in the mini player to go to the next free edge until you have inspected and fixed all free edges.
- Restart the creation of the BRep.
|
 and select the tessellation.

 Pick to select existing areas.
 Brush Mode to edit the segmentation. This mode gives
access to those propagation tools:
 Edit Radius to edit the radius of the brush.
 Edit Angle to edit the angle used by a propagation
tool.
 to edit the radius of the brush.

 .
. to define an angle.
 ,
,  ,
,  ,
,  ,
, or
or  .
. Triangle and pick one triangle. A mono-triangle area is created.

