-
Select the Structures tab.
-
Drag the Table element into the Graphical
area.
A two-columns table is added to the template structure.
-
Drag the Row element to the table.
A new line is added to the table.
Note:
You can add several rows.
- Optional:
To define the table column number, you can:
| Option | Description |
|---|
| Drag the Header Cell element to the header row. |
A new column is inserted at the chosen location in the table, in the header row,
and in the row. |
| Drag the Cell element to a row. |
A new column is inserted at the chosen location in the table, in the row, and
in the header row. |
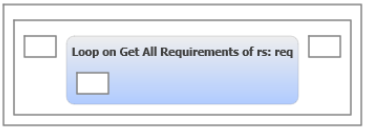
| Drag a loop to the header row and add header cells in the loop.

|
The number of columns becomes variable depending on the loop. You must drag
loops of the same length in each row of the table, and insert the same number of
cells in these loops. |
- Optional:
To customize the display of a table when generating a report, you can:
| Option | Description |
|---|
| Select a chart display for the table. |
For more information about entering a chart style in the
Style field, see Chart Styles for Tables. You can enter an additional
information as simple text, in the Comments field. For
example, you can enter Table displayed as chart. |
| Enter a ratio for a column. |
For more information about defining a ratio for a column in relation with the
table width, see Setting Columns Widths. |
| Format and filter a table, its rows, or its cells. |
For more information, see Formatting and Filtering Options. |
You can now insert text elements in the table.
Example: Creation of a Two-Columns Table
This example presents how to create a table with two columns. This table contains a
loop.
The template must contain a section.
-
From the Structures tab:
- Drag Table into the section.
- Drag Text into the first cell of the header row, click it,
and enter
Name in the Text field of the
Properties tab.
- Drag Text into the second cell of the header row, click it,
and enter
Value in the Text field of the
Properties tab.
-
From the Data tab:
- Expand a variable var and a category cat.
- Drag a method AllElements corresponding to a loop into the table below the header
row.
A new variable is created in Data tab.
-
From the Structures tab, drag Row into the
table in the loop.
-
From the Data tab, expand a variable and a category.
- Drag Data1 into the first cell of the row.
- Drag Data2 into the second cell of the row.
