Customizing the Attributes Displayed in the UI

The various part’s attributes are stored in NETVIBES OnePart as metas. For example, a file name’s extension is stored in the meta called meta_file_extension.

This task shows you how to:

Context:

If you need to add attributes to the UI, then you first need to determine whether it exists already in the OnePart configuration.

If it does not exist, see Write custom document processors.

If the meta exists already then the next step is:

Important: Requires the OnePart Customization SDK

To customize the attributes in the Compare panel

How to choose the attributes displayed in the Compare panel.

  1. Open the Mashup Builder
  2. Select the application page.
  3. Scroll down to the OnePartCompareHits widget in the 5th column.
  4. Click the widget title bar and select Content as shown below.


  5. To remove an attribute, scroll down to find corresponding meta name.
    For example, to remove the Extension attribute, find the line for meta_file_extension.
    Note: Most labels are obvious but you can view a list of labels and corresponding meta in the <ONEPART_INSTALLDIR>\datadir\webapps\360-mashup-ui\WEB-INF\i18n\onePart.properties file.


  6. To add an attribute, click the ‘+’ to add a line and use the arrows to position it. Fill the fields:
    • Title: The title of the line
    • Cell class: A CSS class that is added to the line to be able to apply a specific design to the line
    • Compare mode: Specify the compare strategy between hit value and reference hit value. Possible values are:
    • None: No comparison
    • Exact: Value must be exactly the same
    • Numerical: Value will be considered as close to reference value if it is in range of tolerance. See Preferences icon in top of the widget.
    • Date: Value will be considered as close to reference value if it is plus or minus 10 seconds the reference value.
    • Alphanumerical: Letters will be highlighted to enforce differences between words.
    • Value: The value used for comparison. Useless for None and Alphanumeric compare modes. For date, convert date to int with MEL function ${date:toIndexTime(entry, 'META_NAME')}. For numerical values, use the raw value.
    • Label: The text we will use for displaying the value.
    • Sort name: The field to use to sort on this line. See sorting configuration in CV doc.
    • Mandatory: Is the line displayed even if it is empty?
    • Default: Is the line displayed when user has still not defined its properties?
  7. Click Apply to save the configuration changes.

To choose the attributes in Table view

How to choose the attributes displayed as columns in the Table view.

  1. Open the Mashup Builder.
  2. Select the application page.
  3. Scroll down to the Table - Reuse - OnePart Result table widget.
  4. Click the widget title bar and select Content to view all the metas configured as columns.


  5. To remove an attribute:
    • Scroll down to find corresponding meta name. For example, to remove the Extension attribute, find the column for meta_file_extension.
      Note: Most labels are obvious but you can view a list of labels and their corresponding meta in the <ONEPART_INSTALLDIR>\datadir\webapps\360-mashup-ui\WEB-INF\i18n\onePart.properties file.
    • Click the ‘X’ button to remove it.


  6. To add an attribute, click the ‘+’ to add a line and use the arrows to position it. Fill the fields:
    • Class: A CSS class that is added to the column to be able to apply a specific design to the column

    • Title: The title of the line
    • Sort name: The field to use to sort on this column. See sorting configuration in CV doc.
    • Displayed value: The text we will use for displaying the value.
    • Export value: The value to use for export. When value is empty we use the displayed value, when equals to "_NONE_" we do not export the column
  7. Click Apply to save the configuration changes.

To choose the attributes in Details panel

How to display a new meta in one of the attributes sections of the Details panel; either the Component, File or Other attributes.

Before you begin: Let’s say you want to display the new project meta in the Component attributes of the Details panel below the original file attribute. We need to add this new meta to the existing widget configuration on the application page.
  1. Open the Mashup Builder.
  2. Select the application page.
  3. Scroll down to the first « Value list » widget in the right-hand column of the Advance layout widget.


  4. Click the OnePart 
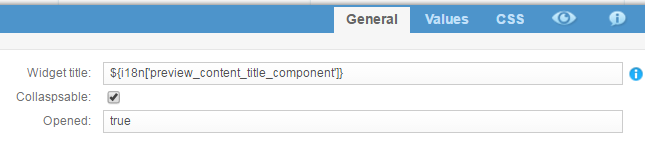
Values list widget title to edit the list of displayed attributes. Select the Values tab as shown below.


  5. To add an attribute:
    • Click the ‘+’ to add a line.
    • Click the up or down arrows to position it in the display.
    • Copy the values from an existing line. Change the meta name to the new one, for example, meta_project (See the procedure Add a new meta to the data model that adds the project meta.):

    • In Title, enter ${i18n['meta_project']}

    Note: OnePart searches for this property value in the i18n properties file at <ONEPART_INSTALLDIR>\datadir\webapps\360-mashup-ui\WEB-INF\i18n\onePart.properties. The 
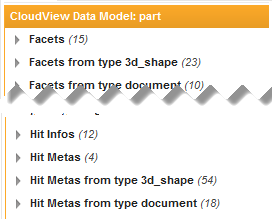
contextual menu on the left also displays the metas available for the part feed.


    • In Value, enter: ${foreach value in entry.metas['project ']}${value}${if loop.hasNext}, ${/if}${/foreach}

    Note: The language used above is called Mashup Expression Language (MEL) allowing you to specify processing of information at display time. For more information about MEL, see the Exalead CloudView Mashup Builder User's Guide.

  6. Click Apply to save the changes.