Creating Slot with Composite Profile | |||||||||
|
| ||||||||
-
From the
Detail section of the
action bar,
click
Slot with Composite Profile
 .
The Slot with Composite Profile dialog box appears.
.
The Slot with Composite Profile dialog box appears. -
In the
Slot and Collar Definition area, click
Define/Edit Slot
 .
.
-
In the
Define Feature and Parameters dialog box, define
the slot.
- In the Type list, select the slot type.
-
In the
Name list, select the required slot.
The name of the slot section depends on the selected slot type.
If no Resources Catalog or Resources Library resource is set in Data Setup, the Type list becomes unavailable and you can click More... in the Name list:
- To select the required slot reference from the catalog or library, if the Structure Reference Catalog or the Structure Reference Library resource is set in Data Setup.
- To search the required slot reference in the database, if no Structure Reference Catalog or Structure Reference Library resource is set in Data Setup.
- Optional:
Keep the
Linked to reference check box selected so as to
link the instantiated slot with its slot reference.
By default, this check box is selected when the slot is defined as linkable in the slot table.
- Select the forming mode from the list.
-
Click
Apply.
The slot parameters are displayed under Slot. The bitmap image of the slot appears next to the parameters. If the selected slot type has a collar, the collar parameters are displayed under Collar.
Important: - If the selected slot section does not contain any collar, the collar area becomes unavailable.
- You cannot change the parameters for slot and collar, after clicking Apply.
- Optional: If the selected slot type has a collar, specify the material and orientation for the collar.
- Click OK.
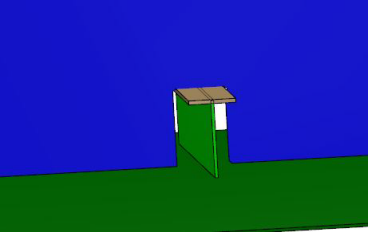
The defined slot is displayed in the Slot with Composite Profile dialog box and is also previewed in the 3D area.Tip: Click Invert button available next to the Flange Element box to invert the slot created for the composite profile containing only web element. The slot is inverted vertically. The below images show an example of the default slot created for the composite profile with only web element and the inverted slot.
Default Slot Inverted Slot 

-
Click
OK in the
Slot With Composite Profile dialog box.
The slot is created.
Warning: If the composite profile is moved, the slot cannot be updated.