Creating a Square-Butt Weld | ||
| ||
-
From the Weld section of the action bar,
click Square-Butt Weld
 .
.
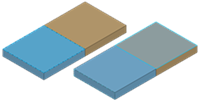
- Select the supports, that is, the top faces of the parts to be welded.
-
Select
the bottom face of a part.

The thickness of the part is determined by the selection of the bottom face of one of the parts. This thickness then determines the vertical edge of the rectangle. In case of two parts with distinct thickness, the smaller of the two thicknesses is taken into account to compute the height of the weld. For more information, see Face Selection Rules.
Tip: Click Preview to see the profile represented by the blue rectangle, and the guide, that is, the edge common to both plates, represented by the dotted line. 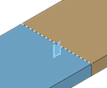
-
Optional: To define the shape of the weld, click the
Manufacturing tab and select an option. The shape
defines the weld seam shape representation in drafting context. If you select
Convex
 or
Concave
or
Concave
 , specify a curvature value in
Offset.
The offset is the maximum distance between the weld
face and arc.
, specify a curvature value in
Offset.
The offset is the maximum distance between the weld
face and arc.
For more information about manufacturing options, see Manufacturing.
Note: Shapes are extracted on drawings.

- An assembly protected weld preparation is created and appears under the
Assembly features
 node.
node.
- The welded 3D shapes are prepared.
Important: In the tree, the weld impact  appears as a feature in the PartBody including
impacted 3D shapes. A rep impact
appears as a feature in the PartBody including
impacted 3D shapes. A rep impact  is created, maintaining a link between the root
product under which the bundle of weld, weld body, and welds are created.
Rep impact appears under Impacts manager
is created, maintaining a link between the root
product under which the bundle of weld, weld body, and welds are created.
Rep impact appears under Impacts manager
 .
.