Creating a Rectangular Pattern | |||||||
|
| ||||||
- From the Transform section of the action bar, click Pattern
 .
The Pattern dialog box appears. Rectangular Pattern is the default option.
.
The Pattern dialog box appears. Rectangular Pattern is the default option. - Select a feature to
pattern.
- Select the first
direction of creation.To define a direction, you can select a line or a planar face.
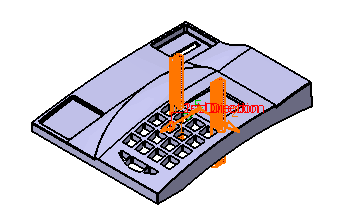
An arrow indicating the direction is displayed on the solid functional set.
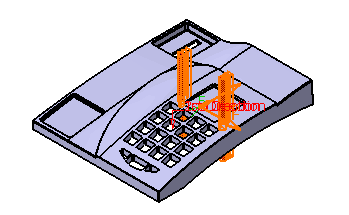
- Select Reverse or click the arrow
to reverse the direction.
- Define the spacing along the selected direction.
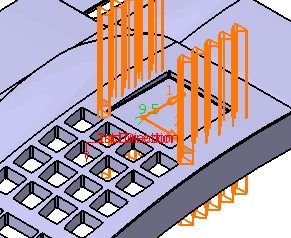
Important: Defining a second direction is not compulsory. Creating a rectangular pattern defining only one direction is possible, but if you need to use a second direction, click the 2nd Direction tab to define other parameters. - Click OK to confirm the operation.

Rectangular Pattern.X is added to the tree in the Solid Functional Set .X node.
Tip: Clicking an instance once removes the instance from the specifications.