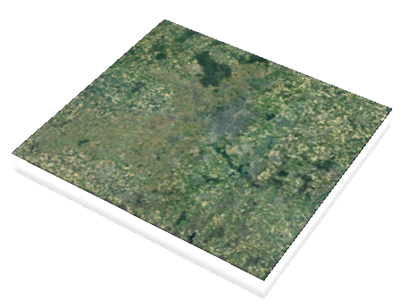
You can create the visual part of the Earth's surface. It can be an orthophoto or a
cartography picture. You can also create prepared datasets from external
services.
The following file extensions are supported: TIF, TIFF, WMS, and WMTS.
Before you begin:
WMTS send less queries to the external server (tiles are already cached) but is impacted by
the server performance.
WMS provides a better quality but there is a price to pay in performance (increased load
time for tiles when loaded for the first time).
TIF gives the best quality but might use a significant amount of space on the tenant and
datasets might take longer to prepare. You cannot create prepared datasets exceeding 30 GB.
From the Referential section of the action bar, click Create Imagery/Map.
This lets you create the visual part of the Earth's surface. It can be an
orthophoto or a cartography picture.
From 3DSpace or 3DSearch, drag the appropriate file onto the "drop source data here" zone displayed on the referential.
Define the following parameters:
Option
Description
Dataset Name
Name of the dataset used to represent the image
file.
Publish Dataset
Select this check box to publish the dataset. This lets you publish your experience to a
City navigation experience afterward.
Dissociate access rights
Select this check box to dissociate access rights to a dataset from
its associated dataset document. The dataset can still be accessed and its content
can be visualized but the associated datasource cannot be downloaded. A new dataset
document is created instead and is used to compute access rights to the
dataset.
This option is especially relevant when you need to share datasets
with confidential data, for example.
When the check box is selected, a
list is displayed to let you choose the collaborative space in which the new
dataset document must be created. By default, the collaborative space containing
the original dataset document is selected.
After clicking
OK to close the creation dialog box, an empty dataset
document is created in 3DSpace with the same name as the dataset. The dataset can then be read as soon as
the new dataset document can be read.
The
icon is displayed in the City Referential panel to reflect the new
status and the Properties panel shows information about
the new document.
Image Resolution
Maximum image resolution in meters per pixel.
Click
OK.
A pop-up message informs you when the creation is successful and the City Referential panel opens (this is the case whenever a dataset is created).
An alert is also displayed under the top bar to inform you about the preparation status (success or failure). This alerts is displayed for a few seconds but you can click from the top bar to open the 3DNotification Center and display your notification history. For more information, see Dashboard Top Bar.
Note:
As this notification is displayed only when the dataset is prepared, it might not be immediately displayed for large datasets that take time to be processed.
From the Available City Datasets area of the
City Referential panel, drag the dataset to the referential
when its status switches to Ready.
The dataset is displayed in the tree on the left and the associated image appears on
the referential.
 .
.
 icon is displayed in the City Referential panel to reflect the new
status and the Properties panel shows information about
the new document.
icon is displayed in the City Referential panel to reflect the new
status and the Properties panel shows information about
the new document. from the top bar to open the 3DNotification Center and display your notification history. For more information, see Dashboard Top Bar. Note: As this notification is displayed only when the dataset is prepared, it might not be immediately displayed for large datasets that take time to be processed.