Creation Commands
The area at the top of the panel lets you create, select, and edit cameras.
The first available view is the current view.
Only the views that are available for the active element appear in the dialog box.
The following options are available:
General
The General area lets you adjust general camera options.
The following options are available:
| Option |
Description |
| Name
|
Displays the name of the view you clicked in the camera list. |
| Type
|
Defines the projection type:
- Perspective switches the camera
to a 3D conic mode.
- Parallel switches the camera to a 3D cylindrical mode.
|
Transformation
The Transformation area lets you adjust the view mode and coordinates of the
camera.
The following options are available:
| Option |
Description |
| Target (X,Y,Z) |
Defines the center of rotation of the camera on the corresponding
axis: X, Y, and Z. |
| Origin (X,Y,Z)
|
Defines your eye position on the corresponding axis: X, Y, and Z. |
| Focal length
|
Defines the distance between the camera
origin and the convergence plane. This option is relevant only
for cameras with a Perspective
projection type.
- Zoom adjusts the camera lens to
increase or decrease the camera's field of view.
- Dolly-zoom adjusts the view angle of while the camera moves.
The focal length defined in this dialog box and
the one defined through the View command are linked. Any change
made in the Manage Camera dialog box is
simultaneously reflected in the camera manipulator. The
Focal length parameter available
in the camera properties is also modified accordingly.
|
Photographic
The Photographic area lets you modify the lens aperture and focus.
The following options are available:
| Option |
Description |
| Shutter speed
|
Defines the shutter speed of the camera. This
option has an impact on the exposure. Values range from
1/4000s to 1s. The higher the value, the darker the image.
|
| Aperture
|
Specifies the amount of light you want on your object. The higher
the value, the sharper the image. The lower the value, the
more blurred the objects out of the focus. When using ray tracing, the depth of field is physically more realistic than in real time.
|
| Focus Mode
|
Defines where the focus of the camera is. Depending on the aperture
value, the other objects can be out of focus.
- Autofocus (AF) is the default and
makes the screen center the focus point.
- Continuous focus (AF-A) lets you
define the focus on the 3D. To modify the distance
value, click
 , and then use the , and then use the  cursor to pick a 3D point. cursor to pick a 3D point.
- Manual focus (MF) defines the
focus according to the value you specify for the focus
distance. To do so, enter a value in the
Focus Distance box, or click
 and then pick an object in the 3D area. and then pick an object in the 3D area.
|
| Exposure
|
Defines the amount of light that determines the brightness of the
image. |
Post Process
The Post Process area lets you define tone mapping options for the image
postprocessing. Each camera can have different tone mapping effects and the values you
defined are stored within each camera.
The following options are available:
| Option |
Description |
| Enable Filter
|
Select the option to activate the
Filter list and select the filter to
be applied. |
| Enable Tone Mapping
|
Activates or deactivates tone mapping
according to the following properties:
Blacks,
Whites,
Saturation, Gamma,
and Vignetting. |
| Blacks
|
Gives more contrast to dark areas. |
| White
|
Gives more contrast to white areas. |
| Saturation
|
Sets the image saturation. |
| Gamma
|
Sets the image gamma. |
| Vignetting
|
Sets the vignetting of the image. |
| Enable Glow
|
Enhances light reflection. Therefore, this option is relevant only for
objects reflecting light. Select this option to activate the
Intensity box that lets you
define how bright the effect is. Make sure that the
Allow bloom option is activated
in the Visual Quality panel. Otherwise,
effects are not visible in the 3D.
|
Clipping
The Clipping area lets you define near clip and far clip properties.
The following options are available:
| Option |
Description |
| Enable Auto Clipping
|
Automatically computes the Near
Clip and Far Clip
properties. |
| Near Clip
|
Defines the distance from which objects are
visible. |
| Far Clip
|
Defines the distance from which objects are no
longer visible. |
Motion
The Motion area lets you define and edit key frames from the original
position of the camera. The key frames are then assembled to generate an animation.
The following options are available:
| Option |
Description |
| Static Camera
|
The camera remains in the same position. No
animation is created. By default, this option is selected.
|
|
Move
|
The camera moves from one camera view to
another. |
|
Move Around
|
The camera rotates around its target
horizontally or vertically according to the selected rotation
type. |
|
Zoom
|
The focal length of the camera changes to
make the object appear closer or further away. |
|
Translate
|
The camera moves along a line from its original point to a
destination that you can specify. |
According to the selected type of animation, other options are available.
For more information, see About Animations Types.
Cameras Panel
The Cameras panel lets you manage and play cameras through
contextual commands.
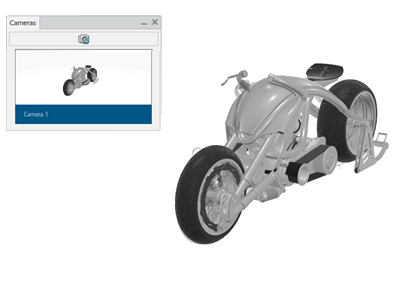
For each camera you create, a new thumbnail displaying the camera preview is added to
the panel.

The name of the active camera is highlighted in blue and animated cameras are
identified by a film strip  . .
When you change the viewpoint of the current view then click Update Camera
From View
 in the
Edit Camera panel, the corresponding camera thumbnail is
updated accordingly. in the
Edit Camera panel, the corresponding camera thumbnail is
updated accordingly.
The Cameras panel lets you:
|
 to unlink the aperture and the exposure. They are
linked by default, which means that whenever you modify
the aperture, the exposure is automatically
adjusted.
to unlink the aperture and the exposure. They are
linked by default, which means that whenever you modify
the aperture, the exposure is automatically
adjusted. .
.