Modifying Decals | ||||||
|
| |||||
-
To open the Appearance Domain dialog box, do one of the
following:
- In the tree, right-click Material
Appearance
 , and then select Material Appearance object > Definition.
 - In the tree, double-click Material
Appearance
 .
. - In the 3D area, right-click a decal, and then select Edit Decal Appearance.
- In the Material Browser, click the arrow at the bottom of the decal thumbnail, and then select Edit Appearance. However, this dialog box does not let you modify decal instances, only the decal reference.
- In the tree, right-click Material
Appearance
-
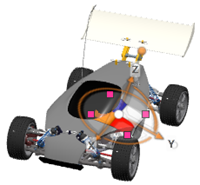
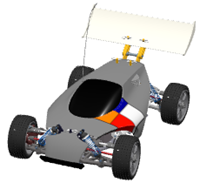
Click Hide/Show 3D Manipulator to activate or deactivate the
display of the 3D manipulator.
Manipulator ON Manipulator OFF 

- In the Decal Dimensions area, define the width and height of the decal.
-
In the Drawing Zone Dimensions area, define the width, height,
and depth of the drawing zone.
Tip: To keep the ratio uniformly according to X and Y, leave the Keep Ratio option selected. -
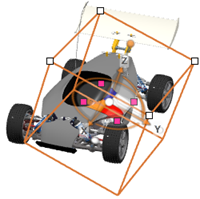
Click Hide/Show Drawing Zone to display or hide the drawing
zone.
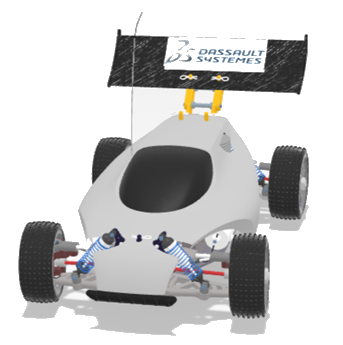
Drawing Zone ON Drawing Zone OFF 
 Note: The 3D Manipulator must be displayed. Otherwise, clicking Hide/Show Drawing Zone has no effect.
 -
In the Mapping Parameters area, select the most appropriate
mapping for the shape of the geometry.
These parameters are used in real-time display only.
Type Description Planar For planar geometries, such as a slide projector or for textures with two privileged directions (chessboard or a wall of bricks). Spherical For spherical geometries, such as a painted light bulb or a ball, or for textures with no privileged direction (stones or raw metal). Finite Cylindrical For cylindrical geometries, such as bottles. Infinite Cylindrical For cylindrical or conic geometries. Cubical For cubical geometries, such as boxes. Geometry UV Complex-shaped texture with bent area (labels or seats). Notes: This mapping projector is available only if the geometry is defined as UV. UV appears after you import a 3D geometry, or when you unfold an operation in Generative Shape Design. -
Click Align with Camera View
 to align the
decal orientation with the current camera.
This command is also available through the 3D manipulator.
-
Define the instance dimensions.
For a same decal reference, you can have multiple instances with different sizes.
The Scale parameter impacts only the selected decal instance, not the decal reference. Therefore, if you modify the scale, the Width and Height values in the Decal Dimensions area do not change, only the decal visualization.
Similarly, changing the decal size directly in the 3D area does not impact the dimensions of the decal reference, but only the Scale parameter.
Parameter Description Scale Lets you define the scale of the decal instance. Scale Ratio Lets you define the ratio between U/V stretching and compressing. Dimensions Lets you modify the decal reference's width and height. Tip: To keep the ratio uniformly according to X and Y, leave the Keep Ratio option selected. For decals created from R2022x onward, there are some specific parameters for the Infinite Cylindrical mapping type:
Parameter Description Angular Width Lets you define the width of the decal as a fraction of 360°. 360° means a full revolution around the object.
Decal Height Lets you define the height of the decal in millimeters. Important: This is not supported by the Iray engine. -
Define the decal positioning.
Parameter Description Repeat U, V Lets you indefinitely repeat the texture along the U and V axes. Flip U, V Lets you invert the texture along the U and V axes. You can also click the axis of the 3D Manipulator along which you want to flip the decal. When you choose Geometry UV, the additional parameters listed below are available and you can either enter your values in the dialog box, or use the handle that is displayed at the center of the decal. You can place the decal anywhere by dragging the center point of the manipulator over the geometry on which the decal is applied.
Important: The dialog box and the 3D Manipulator are synchronized: moving the 3D Manipulator simultaneously changes the values in the dialog box, and entering values on the dialog box simultaneously updates the position and orientation of the 3D Manipulator. -
To modify the decal appearance, edit the parameters under the Decal
Appearance area.
Note:
- Decals have the same appearance parameters as 3DS PBR generic materials. For more
information, see About 3DS PBR Generic
Materials.
You can open this dialog box in the Material Editor in Material Definition.
- Decals are nonemissive and have no thickness. Therefore, volumic parameters are irrelevant and not available for editing.
- Decals have the same appearance parameters as 3DS PBR generic materials. For more
information, see About 3DS PBR Generic
Materials.
- Optional:
To keep the appearance properties when you switch from one decal to another, click
 at the top of the dialog box.
In the list of properties, select those you want to keep. For more information, see About Physical Materials Appearance.
 - To apply a texture to a decal:
- Click Texture Chooser
 .Note: The texture parameters are the same as for the materials. For more information, see About the Texture Chooser and Applying Textures with the Texture Chooser.
 -
In the Type list of the Texture Chooser
dialog box, choose an appearance type.
New parameters are available.

- Click Texture Chooser
-
To modify the multipliers and tone-mapping parameters for the texture, click the
texture thumbnail.
For more information, see Managing Multipliers and Tone Mapping.
- To remove a decal, click Remove Decal
 from the Rendering Scene Design section of the action bar.