Generating NC Code

You can generate NC code from the Manufacturing Program.

This task shows you how to:


Before you begin:
  • Set the required NC data type( APT, CLF-3000 or CLF-15000, or ISO) in the Numerical Control tab of the machine. See Working with Generic Machine Editor.
  • For best results, check the Machining Operations of the Manufacturing Program (by replay or simulation). All Machining Operations must be up-to-date and have a defined status.
  • In order to generate the CLFile output, the PP table associated to the machine must be accessible in read mode.
  • See Syntax of Generated APT Instructions and Creating a Generic Machine and Managing Its Parameters for more information.

Generate the NC Code Interactively

You can generate the NC Code interactively.

  1. Select Generate NC Code Interactively .
    The Generate NC Output Interactively dialog box is displayed. See Generate the NC Code Interactively
  2. Define the Input.
  3. Define the resulting NC Data.
  4. Define the Tool motions. Go to Tools Motions tab and Formatting if you need to modify locally the machine parameters.
    See Working with Generic Machine Editor.
  5. When required, go to NC Code tab to specify a post-processor.
    1. If not already done, go to the Numerical Control tab of the machine to select the Post Processor Provider or Me > Preferences > App Preferences > Simulation > Machining > NC Machining Apps Common Services > Output to select the type of Post Processor (Cenit, 
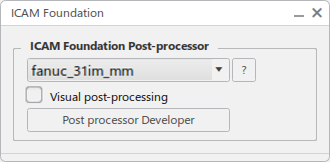
Intelligent Manufacturing Software (IMS), ICAM Technologies Corporation, or ICAM Foundation or My Post).
  6. Select Execute to generate the NC Code file.

    The NC Code Generation progress bar is displayed with the Machining Operations being processed for output and the percentage of progress. The errors and warnings are also displayed in the NC Output Errors and Warnings dialog box.

    1. Go to Me > Preferences > App Preferences > Simulation > Machining > NC Machining Apps Common Services > Output and select No. of Errors and warnings checkbox.
      This helps to configure the output generation stopped after the number of errors and warnings crossed a certain value.
    2. Select Cancel in the NC Code Generation progress bar to stop the output generation.
    3. Select OK in the message that is displayed.
      This message indicates whether the output generation was successful or not. If there are errors or warnings while generating the NC output, the message indicates the number of errors/warnings.
    4. Select Display errors and Display warnings check box in NC Output Errors and Warnings dialog box to view errors and warnings generated during output generation.
    5. Select error or warning in NC Output Errors and Warnings dialog box to highlight the Machining Operationin Activities Process Tree.
      This helps to edit the Machining Operation and perform correction, as required.
    6. Select Close to exit the NC Output Errors and Warnings dialog box.
    • A NC Files Container named _Manufacturing_Program_x is created under the Manufacturing Cell.
      Note: The NC Files Container containing the created Output NC program is stored in the database as a PLM Object.
    • It contains the NC Code file and a log file.
      Note: The log file contains machining time information similar to that obtained during the interactive Display or Simulate, as well as warning/error message entries.

      If the Activate Collision Checking check box is selected in the Part Operation dialog box (see Creating a Part Operation ), the log file indicates whether any collisions have been detected.

    • The Results tab appears in Generate NC Code Interactively dialog box.

Viewing NC Programs in the NC Files Container

The NC Files Container now contains additional files generated during post-processing. The possibility exists to import additional files (for example, shop floor instructions or the files generated by postprocessor on production sites for verifying and validating NC programs) to the container. These additional files are generated and stored inside the NC Files Container during NC Code generation. These additional files maybe required for verification and validation during later stages as deemed important by the post-processor.

  1. From the Results tab of the Generate NC Code Interactively dialog box, select the generated NC document you want to display, and then click View .
  2. From the action bar, click Manage NC Documents, and then select the NC Document you want to display.
  3. In the NC Documents dialog box, click View
    The selected NC documents is displayed.

Export from NC Files Container

The Container Export Path in the Me > Preferences > App Preferences > Simulation > Machining > NC Machining Apps Common Services > Output tab gives the Export Path each time a session begins, thus reducing the tedious key clicks searching down the browse interface to give the Container Export Path.

  1. Select Export from NC Files Container.

    See Viewing NC Programs in the NC Files Container for the context menu for exporting.

    The Export NC Files Container dialog box appears with the default path from the Me > Preferences.

  2. Select ... to change the path.
  3. OK when completed.

Customizing Post Processor for Machines with IMS ® Formatter

You can customize Post Processors for machines with the IMS ® Formatter command.

  1. Click Me > Preferences > App Preferences > Simulation > Machining NC Machining Apps Common Services > Output.
  2. In the Post Processor Folder section, click the IMS ® option.
  3. Choose the PP Path to define which folder(s) contain vendor PPs and executables.
  4. The post processor could be customized from either of the three places:
    • IMS ® Formatter command in the Analysis & Output section of the action bar.
    • Post Processor command from the Numerical Control tab of the Machine Editor.
    • NC Code tab of Generate NC Output Interactively.
  5. Click Formatter to start the IMS ® Formatter.
  6. In the Options File Format dialog box that appears, specify the required information.
  7. Click OK to close the dialog box and validate your changes.

Customizing Post Processor for Machines with ICAM ® Foundation

You can customize Post Processors for machines with the ICAM ® Foundation command.

  1. Click Me > Preferences > App Preferences > Simulation > Machining NC Machining Apps Common Services > Output.
  2. In the Post Processor Folder section, click the ICAM ® Foundation option.
  3. Choose a PP Path to define which folder(s) contain vendor PPs and executables.
  4. The post processor could be customized from either of the three places:
    • ICAM ® Foundation command in the Analysis & Output section of the action bar.
    • Post Processor command from the Numerical Control tab of the Machine Editor.
    • NC Code tab of Generate NC Output Interactively.
  5. In theICAM ® Foundation Post-processor section of the ICAM ® Foundation dialog box that appears, choose a Post Processor from the list.


  6. Click the Post Processor Developer command to start the ICAM ® Foundation to open the panel for customization of the ICAM Foundation post processors.