From the
Referential section of the
action bar,
click
Create Point of Interest.
From 3DSpace or 3DSearch, drag the appropriate file onto the "drop source data here" zone displayed on the referential.
Define the following parameters:
Option
Description
Dataset Name
Name of the dataset.
Publish dataset
Select this check box to publish the dataset on the server. This lets you publish your
experience to a City navigation experience afterward.
Published datasets
are identified by the symbol in the Published column of the
City Referential panel.
Dissociate access rights
Select this check box to dissociate access rights to a dataset from its
associated dataset document. The dataset can still be accessed and its
content can be visualized but the associated datasource cannot be
downloaded. A new dataset document is created instead and is used to compute
access rights to the dataset.
This option is especially relevant when you
need to share datasets with confidential data, for example.
When
the check box is selected, a list is displayed to let you choose the
collaborative space in which the new dataset document must be created.
By default, the collaborative space containing the original dataset
document is selected.
After clicking OK to
close the creation dialog box, an empty dataset document is created in
3DSpace with the same name as the dataset. The dataset can then be read as
soon as the new dataset document can be read.
The icon is displayed in the City Referential panel to reflect the new
status and the Properties panel shows information
about the new document.
Levels
Lets you define the subdivision levels of the quadtree. For each level you add, the corresponding size (in meters) for each tile is displayed in the Tile Size area on the right.
The tile size depends on the referential's bounding box.
Predefined Attributes
Lets you associate predefined attributes contained in the imported
document to those used by the server.
All these attributes are optional.
Their behavior is the default when no mapping is defined, or when the
attribute you define does not comply with the constraints assigned to
each of these predefined attributes.
Exposed Attributes
Additional datasource attributes that will remain associated to the dataset.
This means
that the selected attributes are displayed in the Attributes list in the
Properties panel.
Note:
Predefined attributes
are reserved terms. This means that you cannot expose an attribute
using the name and case of a predefined attribute, whatever the
dataset type. If you try to do so, an error occurs and the dataset
cannot be created. For example, you cannot expose an attribute named
SCALE if these attribute is already a predefined attribute. To be
able to expose the attribute, you must rename it first.
Below are listed the attributes that are predefined for the POI
dataset type:
Attribute Name
Description
Constraints
Default Behavior
STRID
An external ID given by the user.
String
Has to be unique among all GeoItems of a single
source.
Only the first GeoItem is kept if there is
a non-unique STRID.
The index in the layer is set. No update is possible (you
can only regenerate it).
NAME
Name defined by the user.
String
Any other format will be set to "String".
The string is empty.
FILENAME
Name of the associated resource file.
String
Relative path to a file in
resource.
If no explicit value is specified, it is set to the first
PNG file found in the resource.
Otherwise, the string is
empty.
StreamPriority
Number value used to order GeoItems.
GeoItems with
highest values are returned in tiles at Start
Level.
Real
The attribute is set to 0.0.
LifespanStart
Date from which the GeoItem is valid.
Date or string (with date format).
The accepted date format is: yyyy/MM/dd HH:mm:ss.SSSSSS
+HH:mm.
Valid date separators are ‘/’ or ‘-’.
Valid date-time separators are space or ‘T’.
Valid time-time offset separators are space or ‘Z’.
Valid time offset operators are ‘-’ or ‘+’. No operator is equivalent to the
‘+’ operator.
Note:
The time offset is directly applied to the save date and is not
kept.
Should be set before
LifeSpanEnd.
The attribute is set to the start time.
As dates are limited to positive integers and four-digit numbers of the Gregorian calendar, the start time is January 1st in year 0.
LifespanEnd
Date to which the GeoItem is valid.
Date or string (with date format).
The accepted date format is: yyyy/MM/dd HH:mm:ss.SSSSSS
+HH:mm.
Valid date separators are ‘/’ or ‘-’.
Valid date-time separators are space or ‘T’.
Valid time-time offset separators are space or ‘Z’.
Valid time offset operators are ‘-’ or ‘+’. No operator is equivalent to the
‘+’ operator.
Note:
The time offset is directly applied to the save date and is not
kept.
Should be set
afterLifeSpanStart.
The attribute is set to the end time.
As dates are limited to positive integers and four-digit numbers of the Gregorian calendar, the end time is December 31st in year 9999.
In addition to these predefined attributes, there are some internal and
automatically set attributes. Such attributes are not associated to any dataset type
because they cannot be set by the user. They are automatically assigned to
GeoItems.
Internal Attribute Name
Description
Constraints
Default Behavior
uuid
A guaranteed unique ID.
String
Automatically set.
A guaranteed unique ID.
SourceFileName
The name of the datasource file from which the GeoItem is created
is used.
String
Automatically set.
The name of the datasource file from which the GeoItem is created
is used.
Optional:
To give a name to the POI, select the attribute to be exposed (for
instance
NAME, but it can be any other attribute) in
the Exposed Attributes list.
Note:
You can use your own POI icon instead of the default one, provided that
the image is in PNG format.
Click OK.
A pop-up message informs you when the creation is successful and the City Referential panel opens (this is the case whenever a dataset is created).
An alert is also displayed under the top bar to inform you about the preparation status (success or failure). This alerts is displayed for a few seconds but you can click from the top bar to open the 3DNotification Center and display your notification history. For more information, see Dashboard Top Bar.
Note:
As this notification is displayed only when the dataset is prepared, it might not be immediately displayed for large datasets that take time to be processed.
From the Available City Datasets area of the
City Referential panel, drag the dataset to the referential
when its status switches to Ready.
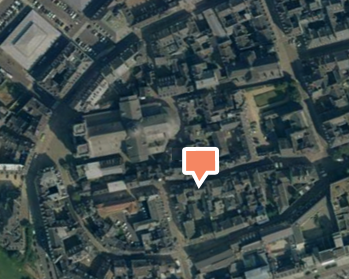
The dataset is displayed in the tree on the left and the POI appears on
the selected referential. The anchor point is in the bottom center of the icon.
Default Icon Customized Icon
Note:
By default, the elevation used for POIs is the absolute elevation. If
the shapefile is in 2D, then the POI is positioned on the terrain.
Optional:
From the standard section of the
action bar,
click
Properties, select
Naming, and then enter the attribute to be
used for naming the POI in the
Name Attribute box.
Note:
the naming is case-sensitive.
Optional:
If relevant, you can display point groups as clusters in your
experience. To do so, select the
Clustering option in the
Properties panel.
 .
.
 symbol in the Published column of the
City Referential panel.
symbol in the Published column of the
City Referential panel.  icon is displayed in the City Referential panel to reflect the new
status and the Properties panel shows information
about the new document.
icon is displayed in the City Referential panel to reflect the new
status and the Properties panel shows information
about the new document. from the top bar to open the 3DNotification Center and display your notification history. For more information, see Dashboard Top Bar. Note: As this notification is displayed only when the dataset is prepared, it might not be immediately displayed for large datasets that take time to be processed.
 , select
Naming, and then enter the attribute to be
used for naming the POI in the
Name Attribute box.
Note: the naming is case-sensitive.
, select
Naming, and then enter the attribute to be
used for naming the POI in the
Name Attribute box.
Note: the naming is case-sensitive.