Introduction | ||
| ||
Problem Description
In this example, you import a text file containing realistic stress-strain test data for a sample of A356 aluminum, and you then perform steps in the Material Calibration app to determine the elastic and plastic material behaviors that best replicate the material's behavior given by the test data. When the calibration is complete, you export the material parameters to a material definition in the database, which allows others in your organization to use the material definition in future simulations.
Workflow
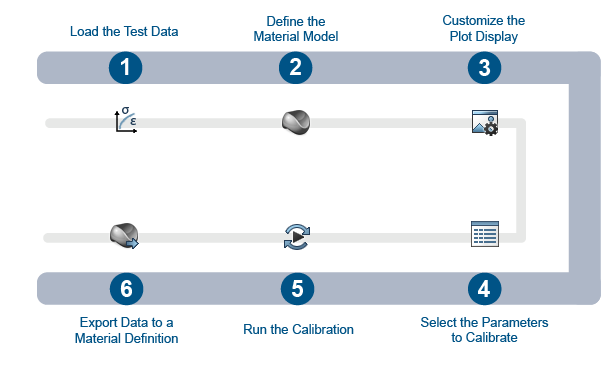
The workflow diagram below provides an overview of the example. The diagram shows the apps that you use as you perform the steps in sequence. Clicking a number in the diagram opens its corresponding step in the example.

| Task | Description | |
|---|---|---|
| 1 | Load the Test Data | Load the test data in the 3DEXPERIENCE platform. |
| 2 | Define the Material Model | Define an elastic-plastic material model with isotropic elasticity and Johnson-Cook plasticity. |
| 3 | Customize the Plot Display | Adjust the color and style of the test data and response curve in the X-Y plot to make it easier to distinguish between them. |
| 4 | Select the Parameters to Calibrate | Assess the elasticity and plasticity parameters of both the test data and the response curve, and select the ones that you want to include in the calibration. |
| 5 | Run the Material Calibration and Review the Calibrated Test Data | Run the calibration job, then revisit the plot and assess how closely the material response curve matches the test data. |
| 6 | Export Data to a Material Definition | Export the elastic and plastic material parameters to a material definition for use in simulations. |
Complete the workflow steps in the order listed. Deviation from the instructions associated with each step might cause errors that prevent a successful material calibration.